Git is an opensource distributed version control system (dvcs) written in the C language and originally developed by Linus Torvalds and others to manage the Linux kernel. In Git, there is no central copy of the repository. After you have cloned the repository, you have a functioning copy of the source code with all the branches and tagged releases, in your local repository.
Gerrit is an opensource web-based collaborative code review tool that integrates with Git. It was developed at Google by Shawn Pearce. Gerrit provides a framework for reviewing code commits before they are accepted into the code base. Changes can be uploaded to Gerrit by any user. However, the changes are not made a part of the project until a code review is completed. Gerrit is also a good collaboration tool for storing the conversations that occur around the code commits.
The OpenDaylight source code is hosted in a repository in Git. Developers must use Gerrit to commit code to the OpenDaylight repository.
Note
For more information on Git, see http://git-scm.com/. For more information on Gerrit, see https://code.google.com/p/gerrit/.
Before you get started, you should have:
an OpenDaylight account (sign up here) See Creating an OpenDaylight Account below for detailed instructions.
git installed (see: http://www.git-scm.com/downloads)
git configured with your name, e-mail address and editor
git config --global user.name "Firstname Lastname"
git config --global user.email "email@address.com"
git config --global core.editor "text-editor-name"
Note
Your name and e-mail address (including capitalization) must match what you entered when creating your OpenDaylight account.
an ssh public/private key pair (see the good Github docs on generating ssh keys)
git-review installed (see: https://www.mediawiki.org/wiki/Gerrit/git-review#Installation)
To clone a new repository:
git clone https://git.opendaylight.org/gerrit/${project_short_name}
For example to clone the Documentation repository:
git clone https://git.opendaylight.org/gerrit/docs
The following sections describe the most common Gerrit tasks you will need to complete while working with code in OpenDaylight.
On your machine, open a shell and switch to the directory with the git repository. Assuming you are using the docs repository:
cd docs
To remove any dependencies on other files you are working on, check out the appropriate branch:
git checkout ${remote_branch_name} # will switch to the branch
Note
normally, ${remote_branch_name} should be master, but during a release, the
master will switch to stable/${release_name}, e.g., stable/carbon at some
point. Also, if you are updating an existing release check out that branch.
Note
If you see an error like``error: pathspec ‘stable/carbon’ did not match any file(s) known to git.``, try this command instead:
git checkout -b ${remote_branch_name} origin/${remote_branch_name}
Note
This should only be necessary once.
Get a copy of the latest files from the server:
git pull                                      # will get all the changes from the server
git reset --hard origin/${remote_branch_name} # (optional) will undo any local changes you've
                                              # (accidentally) made to ${remote_branch_name}
Create a new branch for your work:
git checkout -b ${local_branch_name}
Note
Spaces are not allowed in ${local_branch_name}.
Create new files or edit existing files, as needed.
Commit the files you have worked on:
If you’ve created any new files, run:
git add ${filename}
To commit existing files you edited, run:
git commit -as
Your default terminal text editor will open.
Note
The -as options instruct git to commit all of the files you have edited (-a)
and sign your commit request with your email address and name (-s). The
sign-off is to indicate that you agree with this statement:
Developer's Certificate of Origin 1.1

   By making a contribution to this project, I certify that:

   (a) The contribution was created in whole or in part by me and I
       have the right to submit it under the open source license
       indicated in the file; or

   (b) The contribution is based upon previous work that, to the best
       of my knowledge, is covered under an appropriate open source
       license and I have the right under that license to submit that
       work with modifications, whether created in whole or in part
       by me, under the same open source license (unless I am
       permitted to submit under a different license), as indicated
       in the file; or

   (c) The contribution was provided directly to me by some other
       person who certified (a), (b) or (c) and I have not modified
       it.

   (d) I understand and agree that this project and the contribution
       are public and that a record of the contribution (including all
       personal information I submit with it, including my sign-off) is
       maintained indefinitely and may be redistributed consistent with
       this project or the open source license(s) involved.
Add a brief description of the changes you have made to the beginning of the commit request and then save the request.
Note
Writing good git commit messages is important and relatively easy, but it’s good to familiarize yourself with general guidelines like this How to Write a Git Commit Message Guide.
Important
We have linters that check for some of the style guides including that the first line of a git commit message is 50 characters or less. So, make sure to follow that one.
Submit your files for review:
git reviewDetermine your patch’s change number:
Open either of the emails you received after submitting your files for review.
Locate the following line in the terminal: To view, visit <patch URL>
Note
The number at the end of this URL is your patch’s change number. You will need this in order to make updates to the patch later.
On your machine, open a shell and switch to the directory containing the repository:
cd ${repository_name}, e.g., cd docs
Download the patch you want to update: git review -d ${change_number}
git showgit show --statMake the necessary changes to the patch’s files.
Commit your changes:
run git commit -a --amend
Update the current patch description and then save the commit request.
Note
If you feel as though you did enough additional work on the patch that you should
be mentioned, add your name in the footer with a line like Co-Authored-By: First
Last <email>.
git reviewYou will receive 2 emails from Gerrit Code Review: the first indicating that a build to incorporate your changes has started; and the second indicating whether the build was created successfully.
All contributions to OpenDaylight Git repositories use Gerrit for code review.
The code review process is meant to provide constructive feedback about a proposed change. Committers and interested contributors will review the change, give their feedback, propose revisions and work with the change author through iterations of the patch until it’s ready to be merged.
Feedback is provided and the change is managed via the Gerrit web UI.
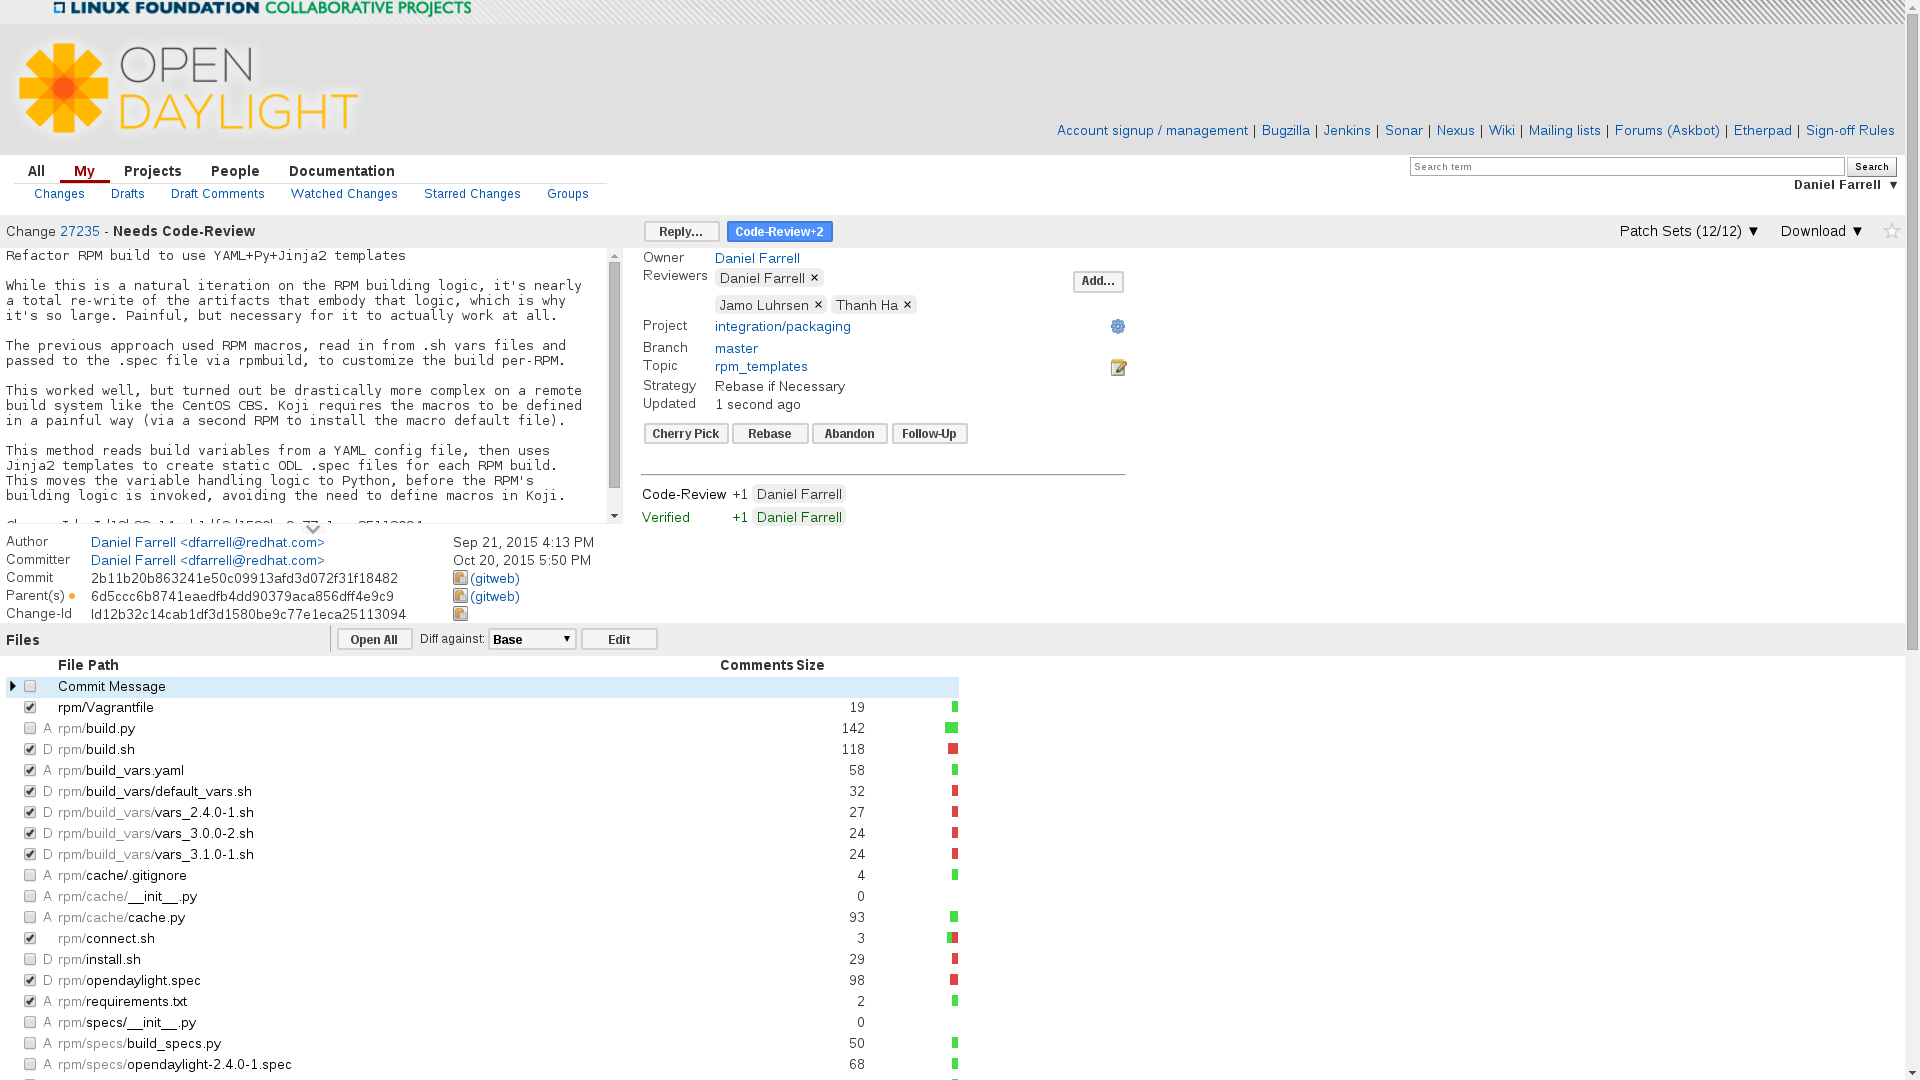
Wide view of a change via the Gerrit web UI
Many times, change authors will want to push changes to Gerrit before they are actually ready for review. This is a good practice and is encouraged. It has been the experience of Integration/* so far that pushing early and often tends to reduce the amount of work overall.
Note
This is not required and in some projects, not encouraged, but the general idea of making sure patches are ready for review when submitted is a good one.
Note
While in draft state, Gerrit triggers, e.g., verify Jenkins jobs, won’t run by default.
You can trigger them despite it being a draft by adding jenkins-releng as a reviewer.
You may need to do a recheck by replying with a comment containing recheck to trigger the
jobs after adding the reviewer.
To mark an uploaded change as not ready for attention by committers and interested contributors (in
order of preference), either mark the Gerrit a draft (by adding a -D to your git review
command), vote -1 on it yourself or modify the commit message with “WIP” (“Work in Progress”).
Don’t add committers to the Reviewers list for a change while it’s in the pre-review state, as it adds noise to their review queue.
Once an author wants a change to be reviewed, they need to take some actions to put it on the radar of the committers.
If the change is marked as a draft, you’ll need to publish it. This can be done from the Gerrit web UI.

Gerrit Web UI button to publish a draft change.
Remove your -1 vote if you’ve marked it with one. If you think the patch is ready to be merged, vote +1. If there isn’t an automated job to test your change and vote +1/-1 for Verified, you’ll need to do as much testing yourself as possible and then manually vote +1 to Verified. You can also vote +1 for Verified if you’ve done testing in addition to any automated tests. Describing the testing you did or didn’t do is typically helpful.
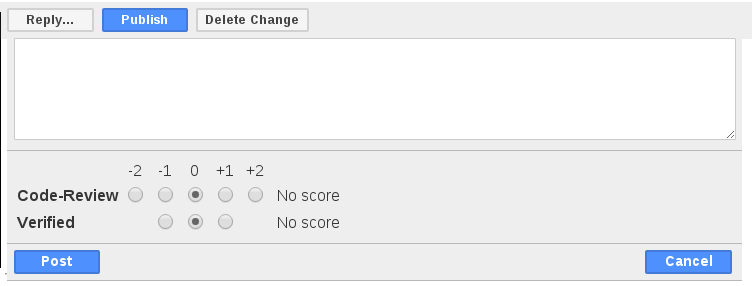
Gerrit voting interface, exposed by the Reply button.
Once the change is published and you’ve voted for it to be merged, add the people who need to review/merge the change to the Gerrit Reviewers list. For Integration/Packaging, add all of our committers (Daniel Farrell, Jamo Luhrsen, Thanh Ha) in addition to any other relevant contributors. The auto-complete for this Gerrit UI field is somewhat flaky, but typing the full name from the start typically works.

Gerrit Reviewers list with Int/Pack committers added
Reviewers will give feedback via Gerrit comments or inline against the diff.

Gerrit inline feedback about a typo
Updated versions of the proposed change should be pushed as new patchesets to the same Gerrit, either by the original submitter or other contributors. Amending proposed changes owned by others while reviewing may be more efficient than documenting the problem, -1ing, waiting for the original submitter to make the changes, re-reviewing and merging.
Changes can be downloaded for local manipulation and then re-uploaded with updates via git-review. See Updating an Existing Patch above. Once you have re-uploaded the patch the Gerrit web UI for the proposed change will reflect the new patcheset.
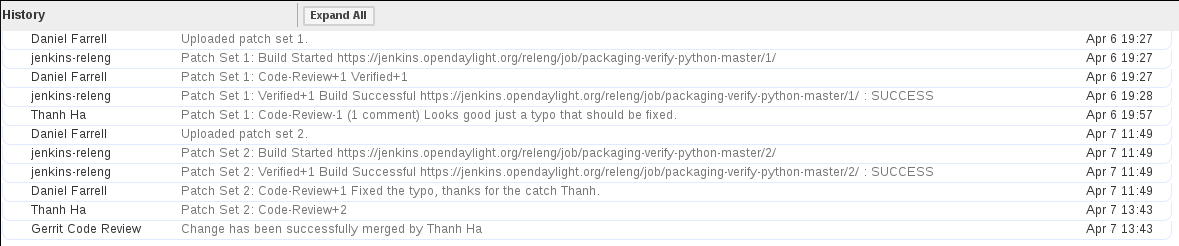
Gerrit history showing a patch update
Reviewers will use the diff between the last time time they gave review and the current patchset to quickly understand updates, speeding the code review process.

Gerrit diff menu
Iterative feedback continues until consensus is reached (typically: all active reviewers +1/+2 and no -1s, definitely no -2s), at least one committer +2s and a committer merges the change.

Gerrit code review votes
Once a patch has gotten a +2 from a committer and they have clicked the submit button the project’s merge job should run and publish the project’s artifacts to Nexus. Once this is done other projects will be able to see the results of that patch.
This is particularly important when merging dependent patches across multiple projects. You will need to wait for the merge job to run on one patch before any patches in other projects depending on it will successful verify.
Using a Google Chrome or Mozilla Firefox browser, go to https://git.opendaylight.org/gerrit
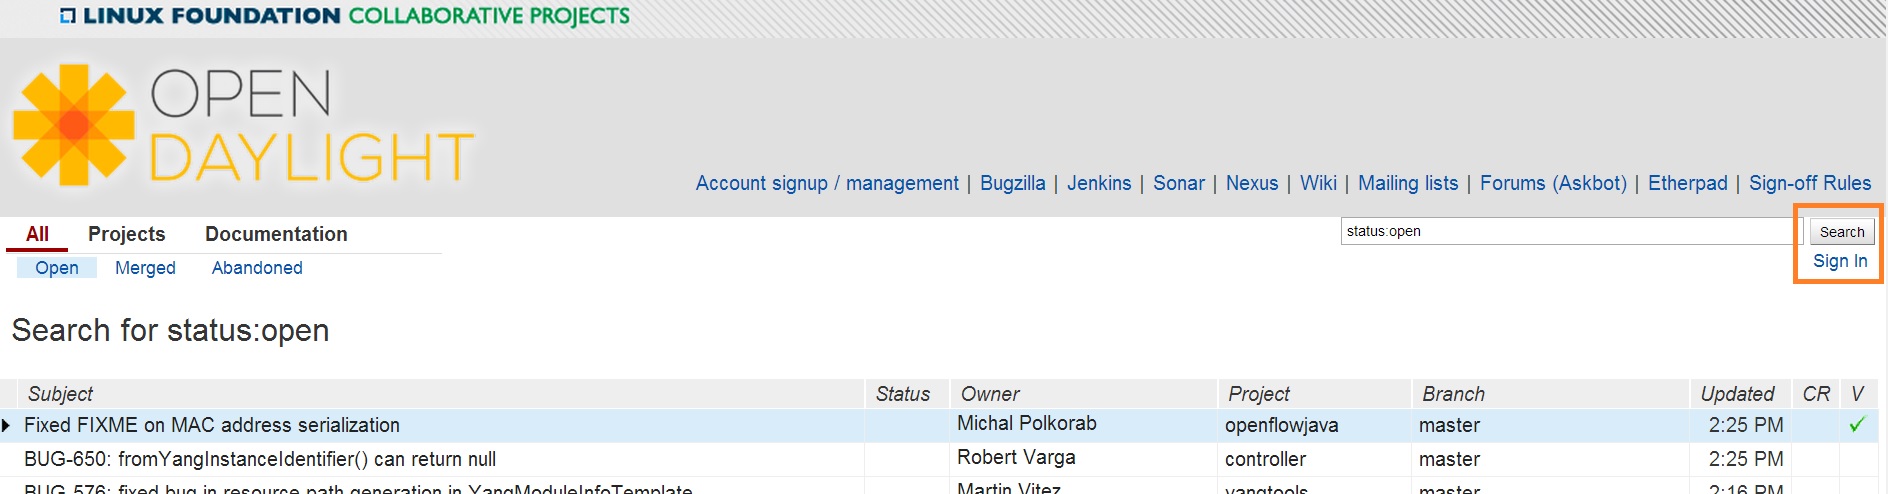
The main page shows existing Gerrit requests. These are patches that have been pushed to the repository and not yet verified, reviewed, and merged.
Note
If you already have an OpenDaylight account, you can click Sign In in the top right corner of the page and follow the instructions to enter the OpenDaylight page.
Signing in to OpenDaylight account
If you do not have an existing OpenDaylight account, click Account signup/management on the top bar of the main Gerrit page.
The WS02 Identity Server page is displayed.
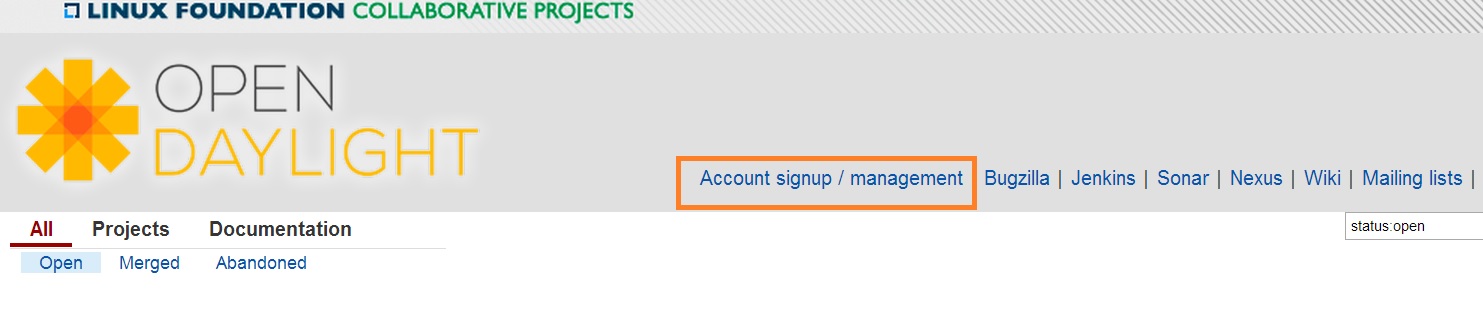
Gerrit Account signup/management link
In the WS02 Identity Server page, click Sign-up in the left pane.
There is also an option to authenticate your sign in with OpenID. This option is not described in this document.
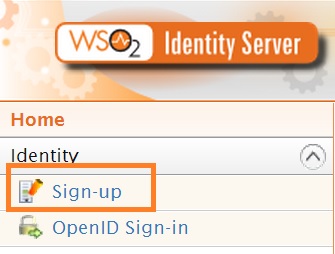
Sign-up link for Gerrit account
Click on the Sign-up with User Name/Password image on the right pane to continue to the actual sign-up page.
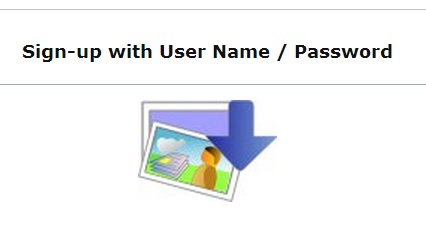
Sign-up with User Name/Password Image
Fill out the details in the account creation form and then click Submit.
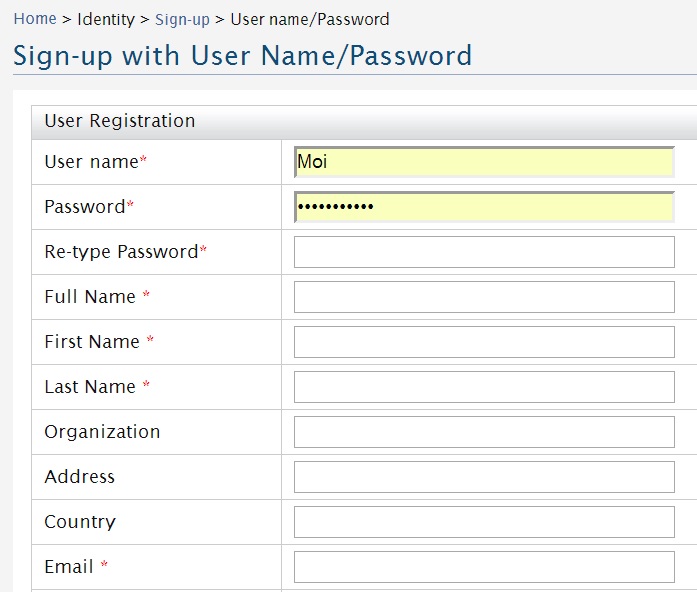
Filling out the details
You now have an OpenDaylight account that can be used with Gerrit to pull the OpenDaylight code.
You must have SSH keys for your system to register with your Gerrit account. The method for generating SSH keys is different for different types of operating systems.
The key you register with Gerrit must be identical to the one you will use later to pull or edit the code. For example, if you have a development VM which has a different UID login and keygen than that of your laptop, the SSH key you generate for the VM is different from the laptop. If you register the SSH key generated on your VM with Gerrit and do not reuse it on your laptop when using Git on the laptop, the pull fails.
Note
For more information on SSH keys for Ubuntu, see https://help.ubuntu.com/community/SSH/OpenSSH/Keys. For generating SSH keys for Windows, see https://help.github.com/articles/generating-ssh-keys.
For a system running Ubuntu operating system, follow the steps below:
Run the following command:
mkdir ~/.ssh
chmod 700 ~/.ssh
ssh-keygen -t rsa
You are prompted for a location to save the keys, and a passphrase for the keys.
This passphrase protects your private key while it is stored on the hard drive. You must use the passphrase to use the keys every time you need to login to a key-based system:
Generating public/private rsa key pair.
Enter file in which to save the key (/home/b/.ssh/id_rsa):
Enter passphrase (empty for no passphrase):
Enter same passphrase again:
Your identification has been saved in /home/b/.ssh/id_rsa.
Your public key has been saved in /home/b/.ssh/id_rsa.pub.
Your public key is now available as .ssh/id_rsa.pub in your home folder.
Using a Google Chrome or Mozilla Firefox browser, go to https://git.opendaylight.org/gerrit.
Click Sign In to access the OpenDaylight repository.
Signin in to OpenDaylight repository
Click your name in the top right corner of the window and then click Settings.
The Settings page is displayed.
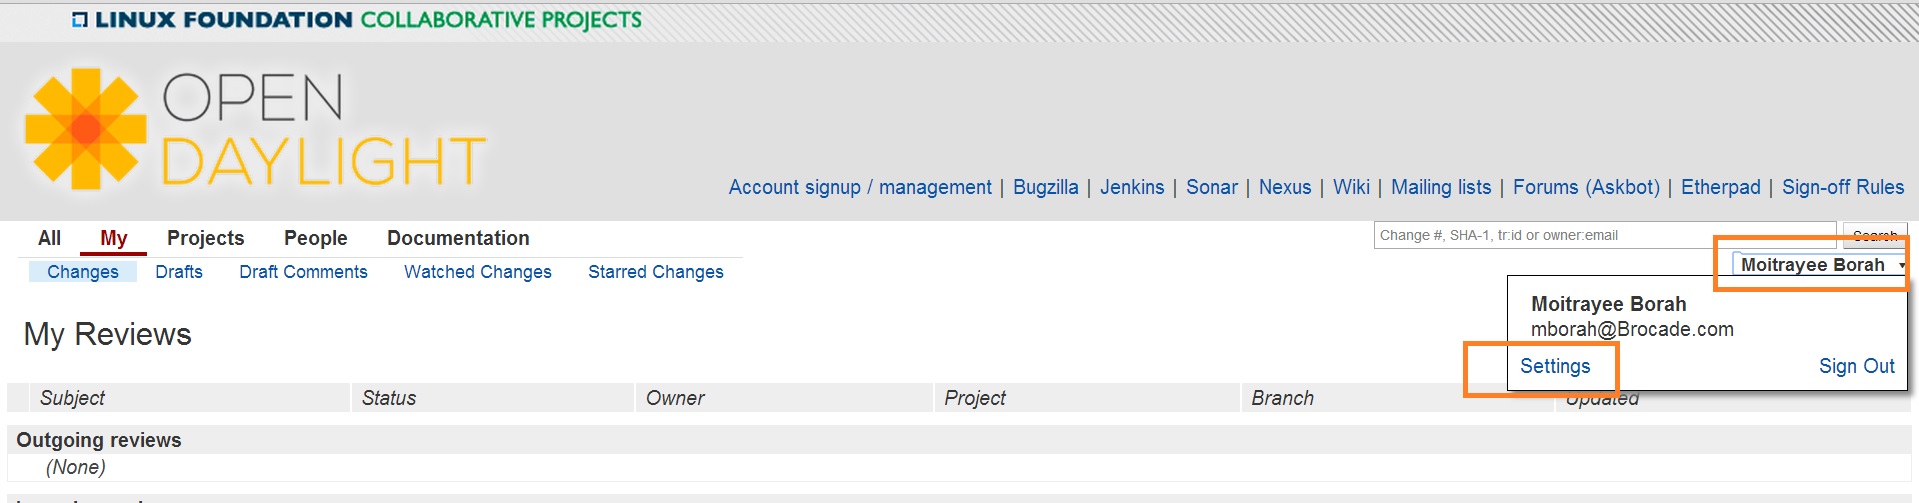
Settings page for your Gerrit account
Click SSH Public Keys under Settings.
Click Add Key.
In the Add SSH Public Key text box, paste the contents of your id_rsa.pub file and then click Add.
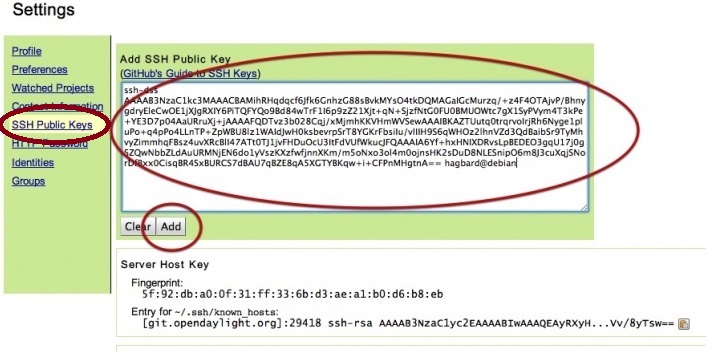
Adding your SSH key
To verify your SSH key is working correctly, try using an SSH client to connect to Gerrit’s SSHD port:
$ ssh -p 29418 <sshusername>@git.opendaylight.org
Enter passphrase for key '/home/cisco/.ssh/id_rsa':
****    Welcome to Gerrit Code Review    ****
Hi <user>, you have successfully connected over SSH.
Unfortunately, interactive shells are disabled.
To clone a hosted Git repository, use: git clone ssh://<user>@git.opendaylight.org:29418/REPOSITORY_NAME.git
Connection to git.opendaylight.org closed.
You can now proceed to either Pulling, Hacking, and Pushing the Code from the CLI or Pulling, Hacking, and Pushing the Code from Eclipse depending on your implementation.
It is highly recommended to use ssh to push to Gerrit. In the event that you cannot use ssh, e.g., a corporate firewall is blocking blocking you, then falling back to pushing via https should work.
Gerrit does not allow you to use your regular account credentials when pushing via https. Instead it requires you to first generate a http password via the Gerrit Web UI and use that as the password when pushing via https.
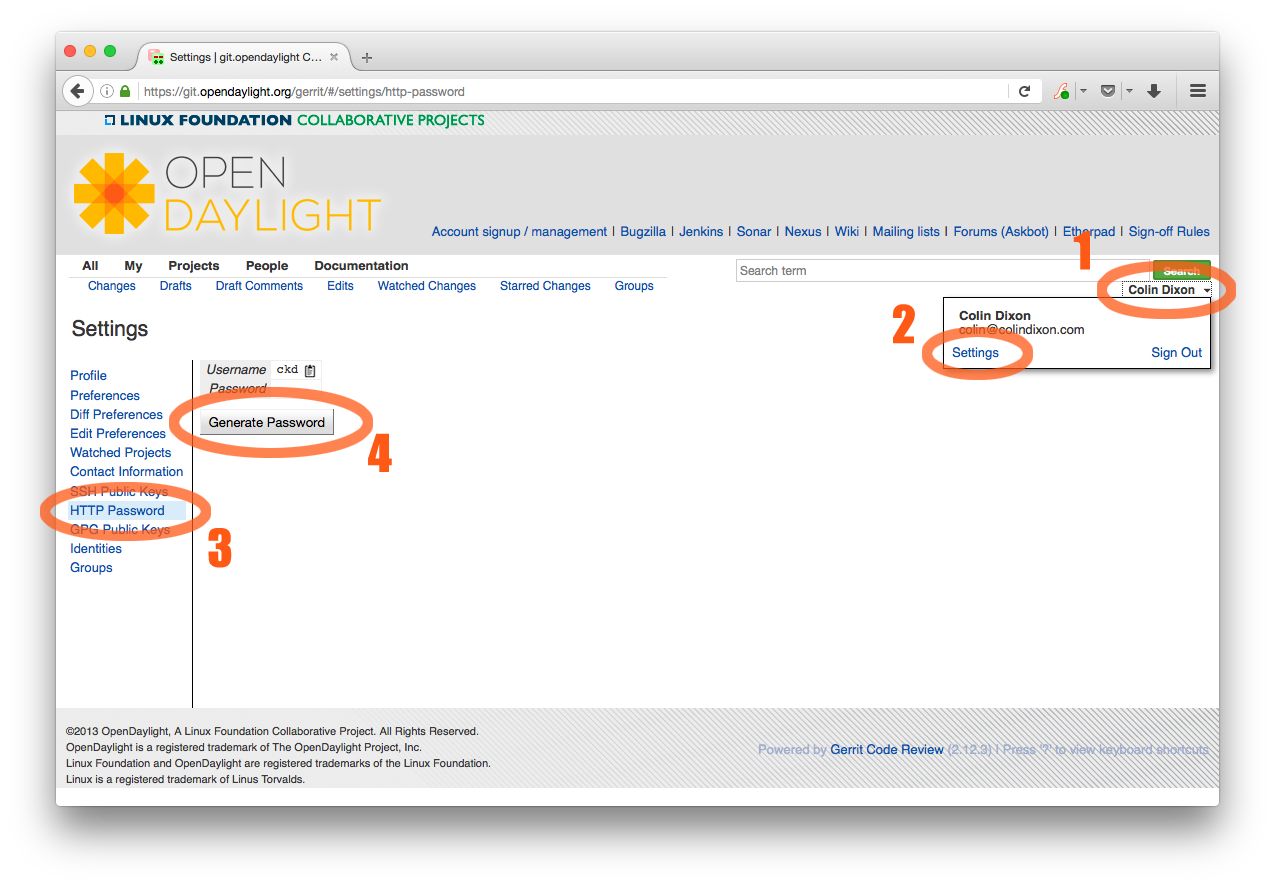
Setting up an https password to push using https instead of ssh.
To do this:
Gerrit will then generate a random password which you will need to use as your password when using Git to push code to Gerrit via https.
To push using git over https, do the following
git remote add https https://git.opendaylight.org/gerrit/p/${repo_name}  # adds an https version of the git server
git push https HEAD:refs/for/${branch_name}                        # will ask you for your username and password
                                                                   #   ${branch_name} should usually be master,
                                                                   #   but can be stable/carbon or something else
Generate your GPG key.
The following instructions work on a Mac, but the general approach should be the same on other OSes.
brew install gpg2  # If you don't have homebrew, get that here: http://brew.sh/
gpg2 --gen-key
# pick 1 for "RSA and RSA"
# enter 4096 to creat a 4096-bit key
# enter an expiration time, I picked 2y for 2 years
# enter y to accept the expiration time
# pick O or Q to accept your name/email/comment
# enter a pass phrase twice. it seems like backspace doesn't work, so type carefully
gpg2 --fingerprint
# you'll get something like this:
# spectre:~ ckd$ gpg2 --fingerprint
# /Users/ckd/.gnupg/pubring.gpg
# -----------------------------
# pub   4096R/F566C9B1 2015-04-06 [expires: 2017-04-05]
#       Key fingerprint = 7C37 02AC D651 1FA7 9209  48D3 5DD5 0C4B F566 C9B1
# uid       [ultimate] Colin Dixon <colin at colindixon.com>
# sub   4096R/DC1497E1 2015-04-06 [expires: 2017-04-05]
# you're looking for the part after 4096R, which is your key ID
gpg2 --send-keys $KEY_ID
# in the above example, the $KEY_ID would be F566C9B1
# you should see output like this:
# gpg: sending key F566C9B1 to hkp server keys.gnupg.net
If you’re trying to participate in an OpenDaylight keysigning, then
send the output of gpg2 --fingerprint $KEY_ID to
keysigning@opendaylight.org
gpg2 --fingerprint $KEY_ID
# in the above example, the $KEY_ID would be F566C9B1
# in my case, the output was:
# pub   4096R/F566C9B1 2015-04-06 [expires: 2017-04-05]
#       Key fingerprint = 7C37 02AC D651 1FA7 9209  48D3 5DD5 0C4B F566 C9B1
# uid       [ultimate] Colin Dixon <colin at colindixon.com>
# sub   4096R/DC1497E1 2015-04-06 [expires: 2017-04-05]
Install gpg, instead of or addition to gpg2. It appears as though gpg2 has annoying things that it does when asking for your passphrase, which I haven’t debugged yet.
Note
you can tell Git to use gpg by doing:
git config --global gpg.program gpg2
but that then will seem to struggle asking for your
passphrase unless you have your gpg-agent set up right.
Add you GPG to Gerrit
Run the following at the CLI:
gpg --export -a $FINGER_PRINT
# e.g., gpg --export -a F566C9B1
# in my case the output looked like:
# -----BEGIN PGP PUBLIC KEY BLOCK-----
# Version: GnuPG v2
#
# mQINBFUisGABEAC/DkcjNUhxQkRLdfbfdlq9NlfDusWri0cXLVz4YN1cTUTF5HiW
# ...
# gJT+FwDvCGgaE+JGlmXgjv0WSd4f9cNXkgYqfb6mpji0F3TF2HXXiVPqbwJ1V3I2
# NA+l+/koCW0aMReK
# =A/ql
# -----END PGP PUBLIC KEY BLOCK-----
Browse to https://git.opendaylight.org/gerrit/#/settings/gpg-keys
Click Add Key...
Copy the output from the above command, paste it into the box, and click Add
Set up your Git to sign commits and push signatures
git config commit.gpgsign true
git config push.gpgsign true
git config user.signingkey $FINGER_PRINT
# e.g., git config user.signingkey F566C9B1
Note
you can do this instead with git commit -S
You can use git commit -S and git push --signed
on the CLI instead of configuring it in config if you
want to control which commits use your signature.
Commit and push a change
change a file
git commit -asm "test commit"
Note
this should result in Git asking you for your passphrase
git review
Note
this should result in Git asking you for your passphrase
Note
annoyingly, the presence of a gpgp signature or pushing of a gpg signature isn’t recognized as a “change” by Gerrit, so if you forget to do either, you need to change something about the commit to get Gerrit to accept the patch again. Slightly tweaking the commit message is a good way.
Note
this assumes you have git review set up and push.gpgsign set to true. Otherwise:
git push --signed gerrit HEAD:refs/for/master
Note
this assumes you have your gerrit remote set up, if
not it’s something like:
ssh://ckd@git.opendaylight.org:29418/<repo>.git
where repo is something like docs or controller
Verify that your commit is signed by going to the change in Gerrit and checking for a green check (instead of a blue ?) next to your name.
Install gpg-agent and pinentry-mac using brew:
brew install gpg-agent pinentry-mac
Edit your ~/.gnupg/gpg.conf contain the line:
use-agent
Edit your ~/.gnupg/gpg-agent.conf to something like:
use-standard-socket
enable-ssh-support
default-cache-ttl 600
max-cache-ttl 7200
pinentry-program /usr/local/bin/pinentry-mac
Edit your .bash_profile or equivalent file to contain the
following:
[ -f ~/.gpg-agent-info ] && source ~/.gpg-agent-info
if [ -S "${GPG_AGENT_INFO%%:*}" ]; then
  export GPG_AGENT_INFO
else
  eval $( gpg-agent --daemon --write-env-file ~/.gpg-agent-info )
fi
Kill any stray gpg-agent daemons running:
sudo killall gpg-agent
Restart your terminal (or log in and out) to reload the your
.bash_profile or equivalent file
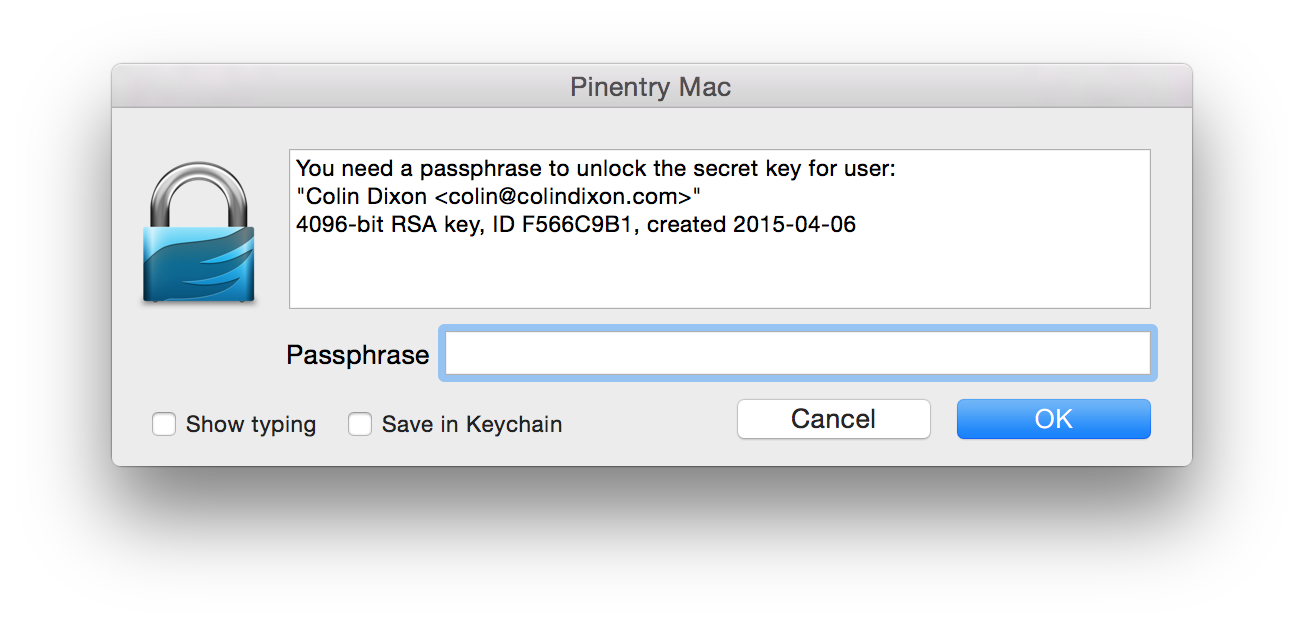
The next time a Git operation makes a call to gpg, it should use your gpg-agent to run a GUI window to ask for your passphrase and give you an option to save your passphrase in the keychain.
You need to log In with JIRA to submit feedback
Your suggestion:
